This last session begins after the first season of driving. We put 1366 miles on the car and it all worked well but it has become clear that the donor parts that I used have some issues. 1) The rear differential does not slip as it should, when I corner I get a clunking sound and 2) The 2nd gear syncros are worn.
Here is a list of upgrades / replacements that are planned.
From Mike Forte
-
Complete engine rebuild
-
New T-5 Transmission
-
New 8.8 rear axle assembly (3:73 gears)
I pulled the car into the garage early November-2006 and had it apart, Interior out, Body off and Drive Train out in one day (back to a roller)

Back down to a Roller
I’ll start with the engine. Here are three photos in sequence. 1) The engine as it was when I removed it from the Donor Car

Donor Engine as removed
Here is the engine as it looked as I put it into the roadster (first season). All I did was clean it up add some paint and put new gaskets on.

Cleaned Up engine (year one)

Engine Cleaned Up (year One)
Next will be a picture of the rebuilt engine. I have the whole series of pictures documenting the rebuild but I’ll just skip the the final result. Here is a list of the power adders:
1) Cobra Polished Intake & Plenum, 2) Edelbrock Performer Aluminum Heads, 3) 65MM Throttle Body, 4) B303 Cam were the main players.
There was a huge difference in the performance and also the sound. The engine has a nice pop to the idol.

Rebilt Engine (started first click)
The next sections are kind of fragmented as I was jumping around with the finishing steps. The body and related panels were delivered to the painter and I will have 6 weeks to complete the finishing before the body is returned.
Here is the Fire Wall and Dash pictures. Included in these pictures you can see the custom fabricated glovebox. I needed to have it fit around the heater.

Firewall Before Finishing

Firewall Completed
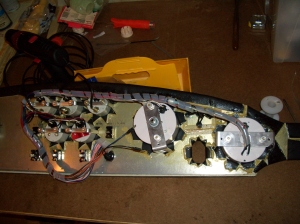
Dash Wiring Complete
When wiring the dash, it is important to install plugs. That way the installation & removal will be quick as it is very difficult to fit your hands behing the dash to make connections.

Dash Complete
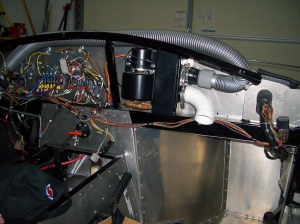
Southern Rods Heater
Next I focused on the interior. I needed to upgrade the size of the speakers as the ones that were first installed were not powerfull enough to out perform the sidepipes.
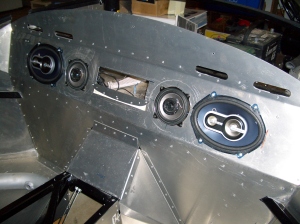
Speaker Upgrade
Heat proofing & sound proofing. Using 3M spray-on contact cement was the perfect product to stick down both the dynamat & carpets. All of the dynamat seams were taped with the aluminum tape.

Dynamat Installation
Dash is installed. Dual signal lights, High beam & Alternator lights. the toggle switches control the Fan, Wipers, heater blower, power on & the starter. I do not have an ignition key, I liked the idea of a race car start.
The battery Cut-Off key secures the car.
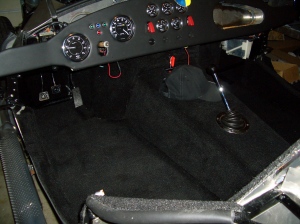
Final Carpet
Here you can see where I added a hinged piece of diamond plate to cover the battery box.

Final Trunk Carpet
Rick helped install the engine. It was a very, very cold January night. Using a load leveler makes the job much easier.

Engine Drop

Engine Drop
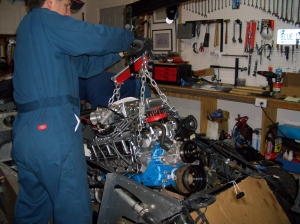
Engine Drop

Engine In
Next are some pictures of the Body. I used a local painter (Pete’s Restoration) who was located in Danbury, CT. at the time. I selected Dodge Patriot Blue with Arctic White stripes. Pete did a great job, my roadster was the 12th one that he painted

Primer

Primer Rear
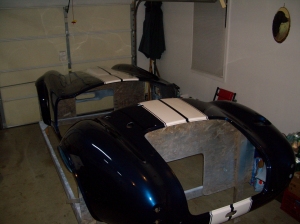
Finished Paint

Finished Paint
In order to protect the paint surface from a thing called “spider cracks” it is recommended to paint the under side of the body shell with a rubberized paint, the type that you use for a truck bed.
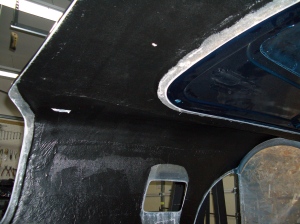
Rubberized Paint
Here the body is mounted and the finishing touches are being installed
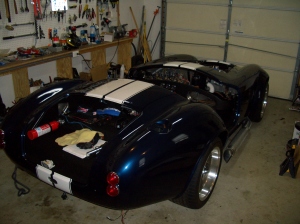
Body Mounted

Body Mounted
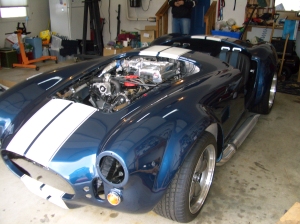
Final Body Mounting

Windshield On

More Finishing

One problem that I encountered was the side piped drooping. The flange that mounts to the “J-Pipes” tends to wiggle around over time and the front of the pipes will sag. I fabricated a set of adjustable hangars that will hold these up.

Side Pipe Hangar
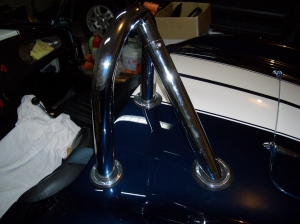
Roll Rar Bezels


One of the upgrades that I made was to change out the Coil Over Shocks. In some rare cases, the original Bilstien Shocks were breaking. As a result of this problem FFR offered a replacement deal to purchase Koni shocks, a much better product, for a great discounted price.
Here you can see the difference in the shocks.

Bilstien (gold), Koni (red)
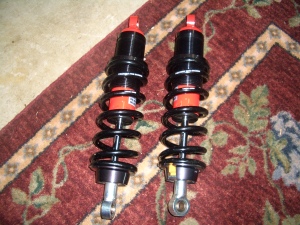
Replacement Koni’s

The car has been completed and on the road since Feb-2007 and we have enjoyed it completely. Some of the seasonal upgrades are as follows:
-
Brake Duct Screens
-
Chrome Over-riders
-
Windwings / Sun Visors
-
MP3 adapter
-
12V Power Plug
-
Koni Shocks (seen above)
-
Trunk Prop Struts
-
Brake Reservoir Relocation
-
Better Bulb Seal
-
Mini High Torque Starter
-
Gordon Levy Oil Pan
-
90 degree Oil Filter Mount
-
Snapless Tonneau Cover
- New Roadster Seats
- Seat Heaters
- 4 into 4 headers
- Auger style baffles
nice job Doug .
TR6 is a very nice car which is rare in France so very expensive : 30 k€ for a rebuilt version .
My brother in low has got a red one .
Vincent
Vincent: Would you be able to e-mail me a picture of your Brother-in-law’s car? Thank you
I am extremely impressed along with your writing abilities as neatly as with the structure to your weblog.
Is this a paid topic or did you customize it your self?
Either way stay up the excellent high quality writing, it’s uncommon to peer a great blog like this one nowadays..
Lovely build on the FF5. I’ve looked at your TR6 work too. All very impressive. It would be neat to see an update on these cars.
Thank you, I have neglected the site for a while, The TR6 was sold in 2016 but I still drive the FFR. Maybe I’ll do a maintenance page as I get FFR5355 ready for the spring. Cheers